
Synergita Workflow allows organizations to define and configure the step-by-step process for completing an appraisal cycle. Synergita provides 40+ activities that can be used to manage the end-to-end appraisal process. Organizations can select, arrange, and customize these activities based on their specific appraisal process and business requirements.
The workflow ensures that each activity is performed in the right sequence by the appropriate users, helping organizations manage the appraisal process in a structured and consistent manner.
To Configure Workflow
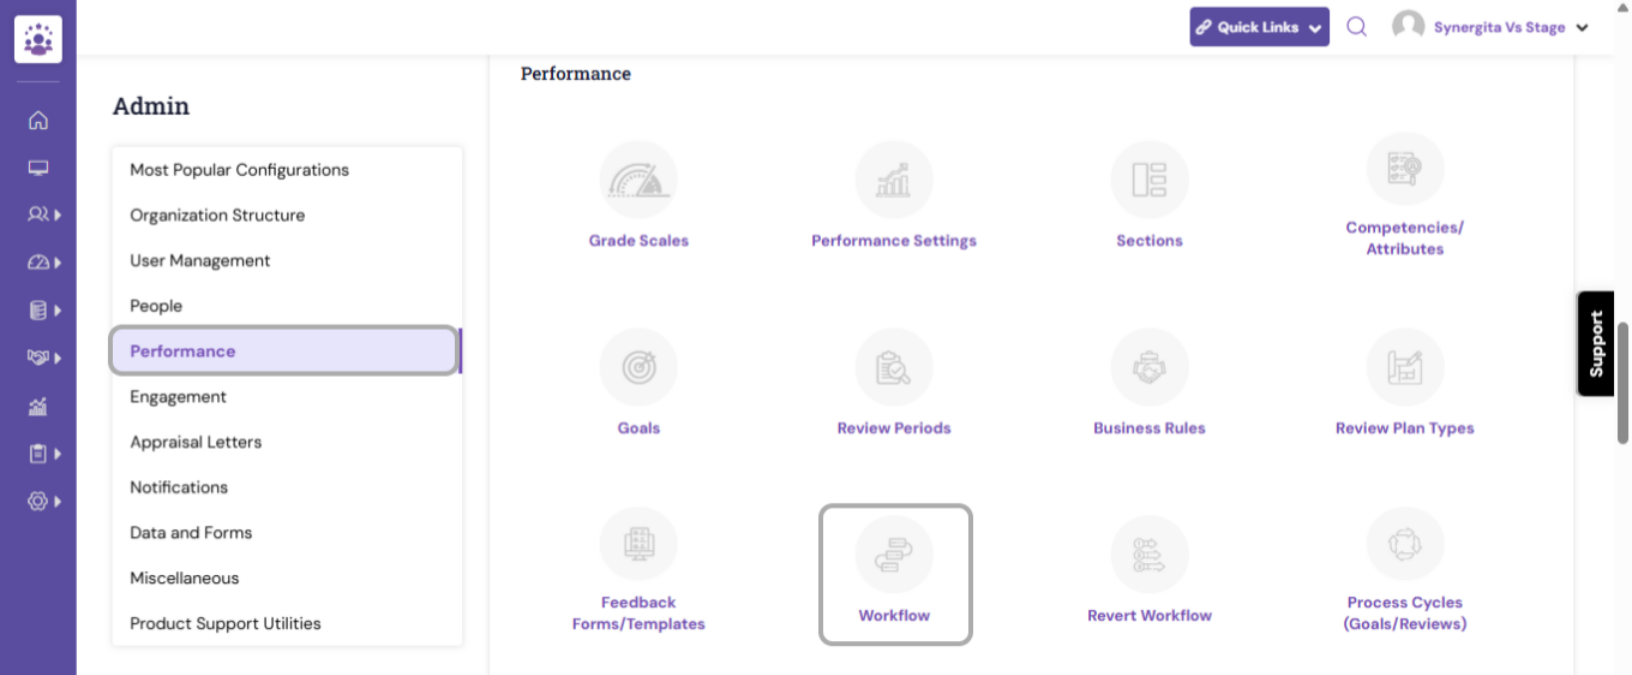
Navigate to Admin > Performance > Workflow
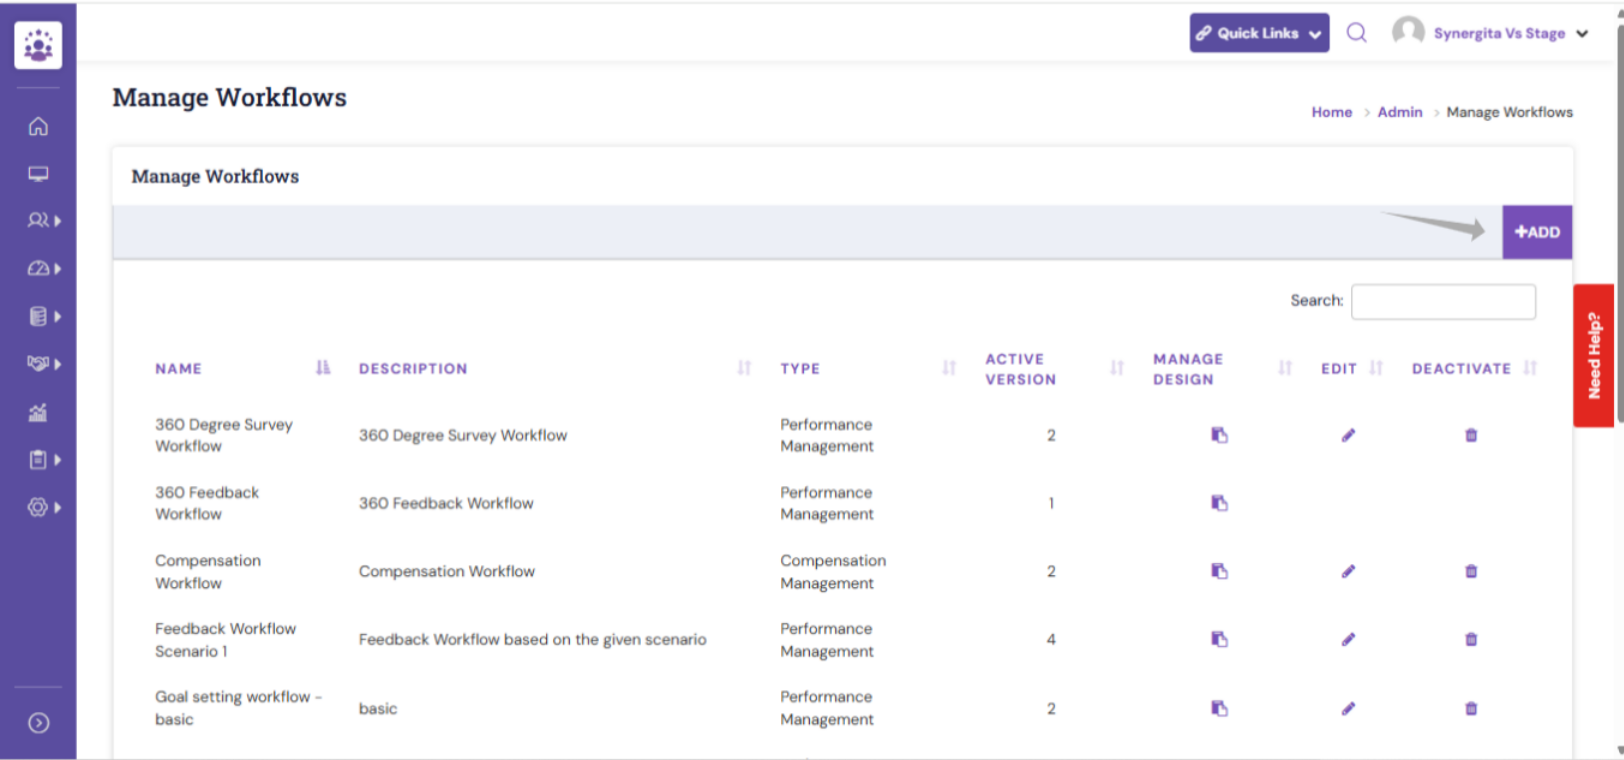
2. Click Add to create a New Workflow.
3. Enter the following details:
- Workflow Name: Enter a name to identify the workflow.
- Description: Provide a brief description of the workflow.
- Type: Select the appropriate workflow type:
- Performance Management: Select this for performance and appraisal-related activities.
- Compensation Management: Select this for compensation-related activities.
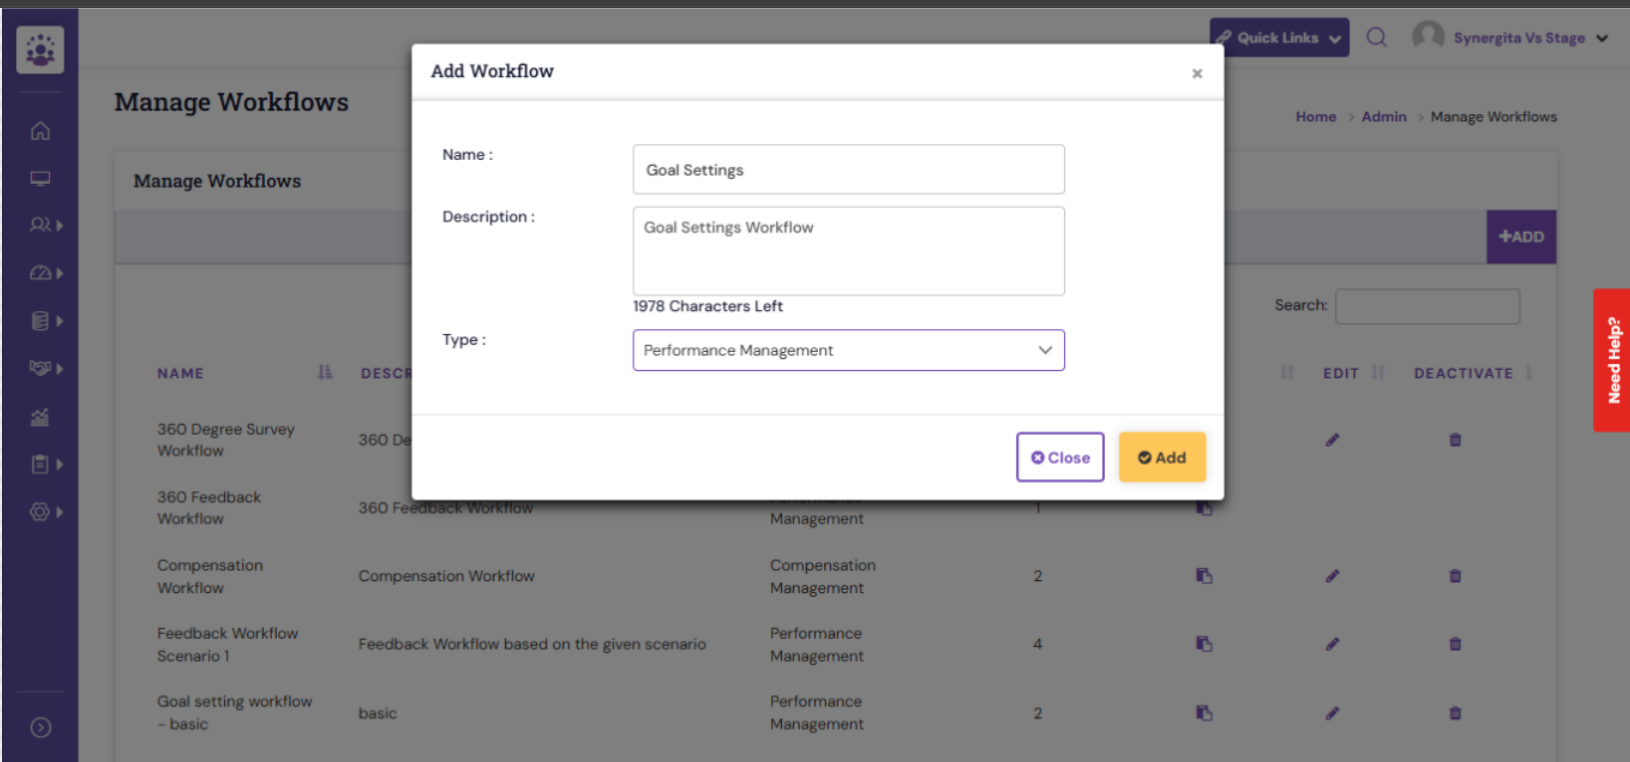
4. After entering all the required details, click Add. The workflow will be created and displayed in the workflow list.
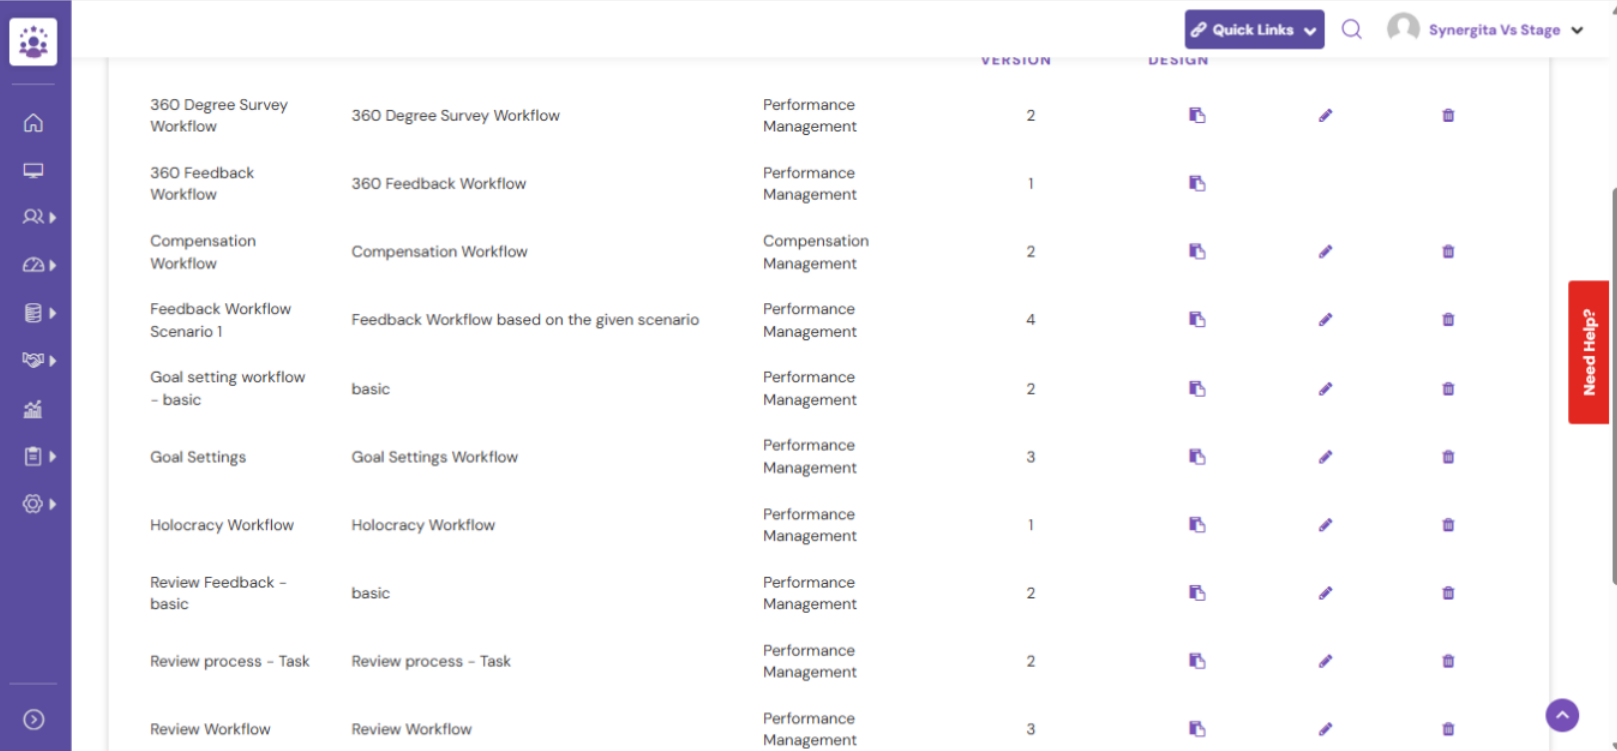
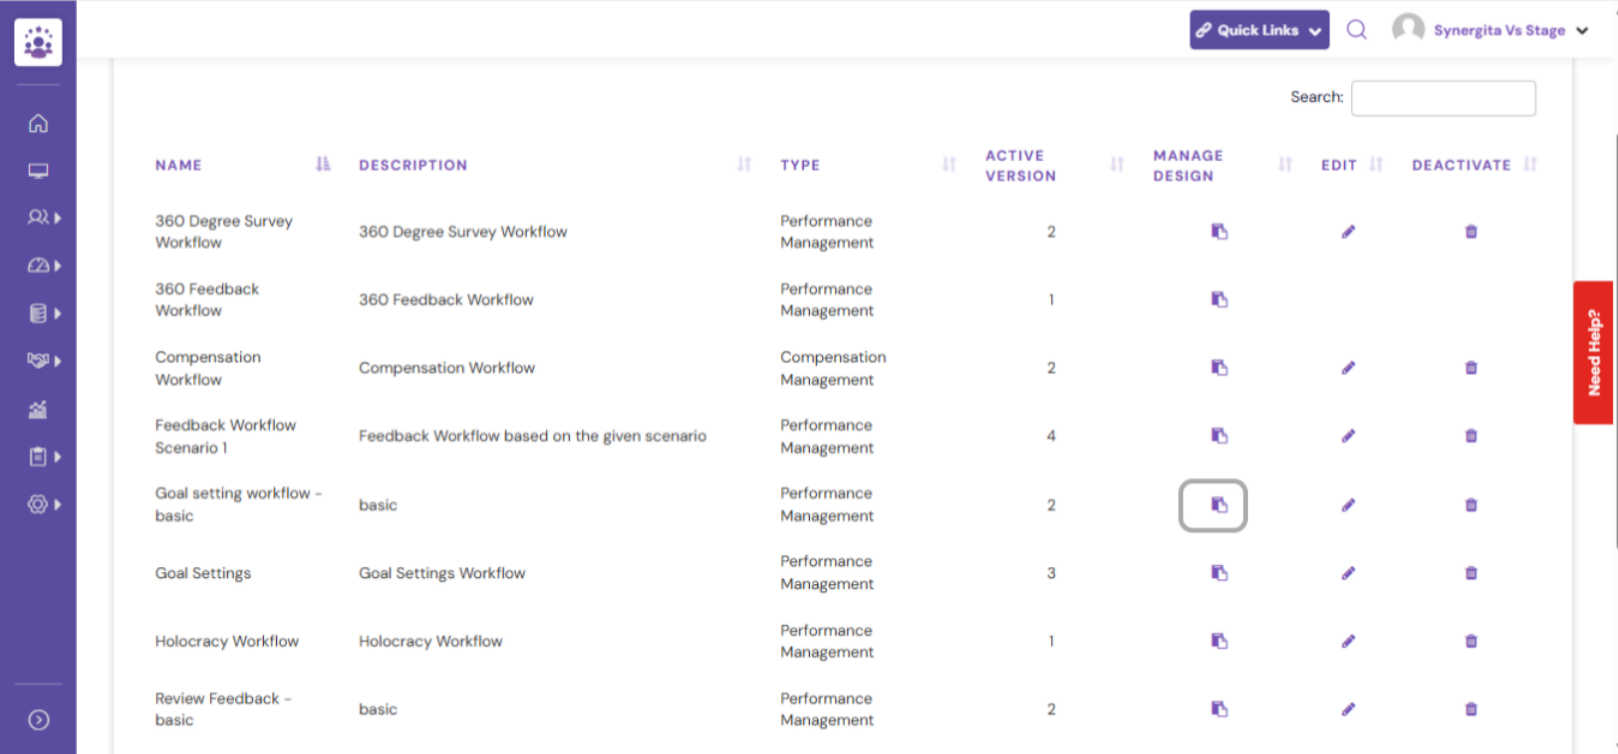
5. Click Manage Design icon corresponding to the created workflow to configure and define the activities in the workflow.
6.Click Copy to create a copy of the workflow design.
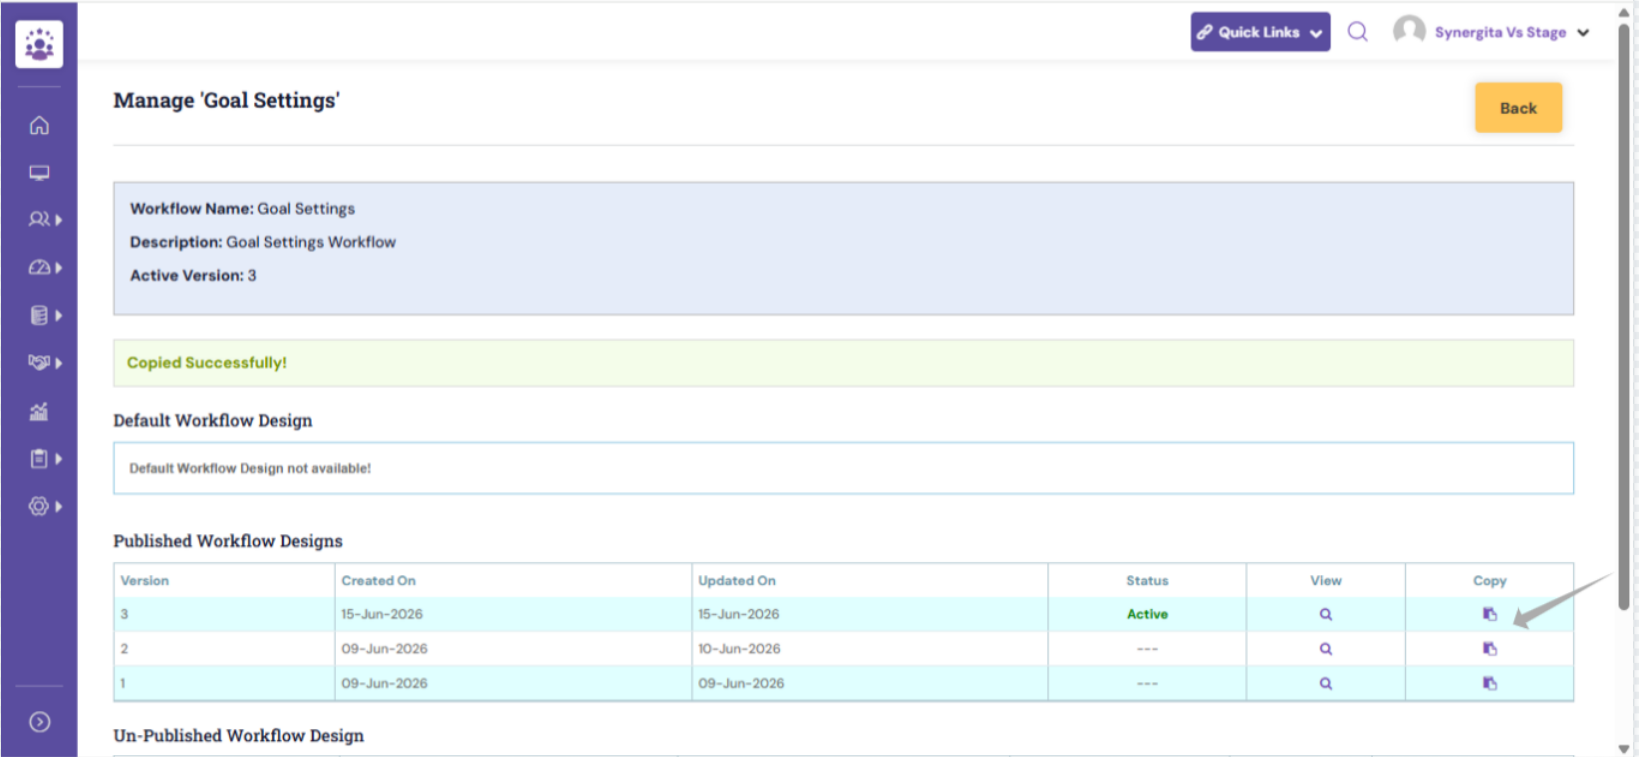
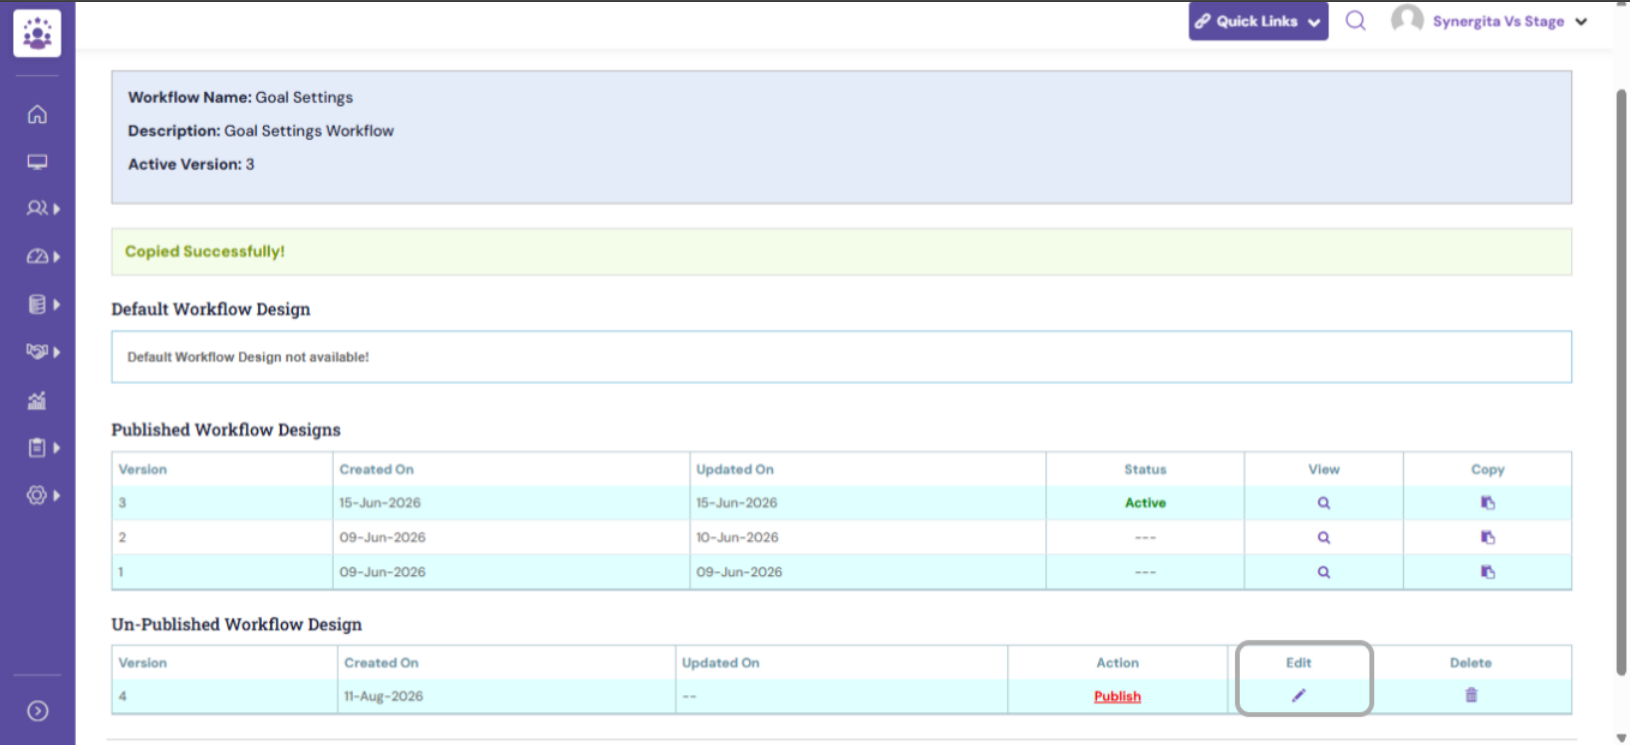
7.Then click Edit to configure the workflow by defining the required activities and their sequence.
8. The workflow consists of 5 tools and 40+ activities, which can be configured and arranged to create a customized workflow that accommodates the organization's end-to-end appraisal process.
Workflow Tools
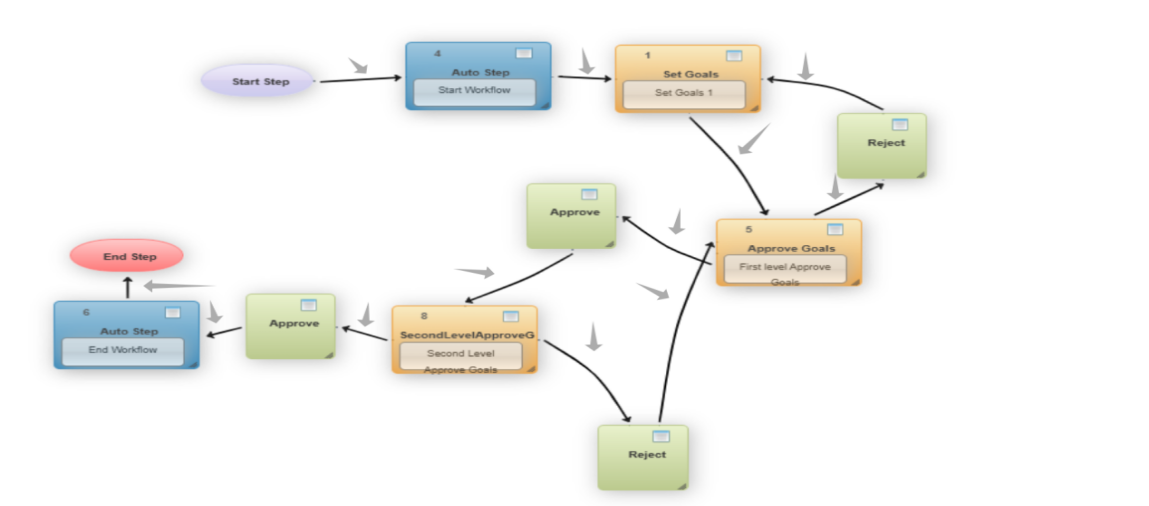
The Synergita Workflow provides five tools — Start, Manual, Auto, Route, and End. These tools help you define the sequence and behavior of each step in the workflow.
Start: The Start tool defines the beginning of the workflow and initiates the appraisal process.The Start step is mandatory for every workflow.
Manual: The Manual tool is used for activities that require action or input from a user.
For example, Setting Goal and Provide Feedback.
Auto: The Auto tool is used for activities that are performed automatically by the system.
For example, adding raters or reviewers and publishing feedback
Route :The Router is used to define different paths in the workflow based on the action selected by the user. The Router must consist of two steps,
For example, at an approval stage, the user can choose:
Approve: Moves the workflow to the next defined activity.
Reject: Routes the workflow to the configured rejection activity or previous stage.
End : Defines the completion point of the workflow.The End step is mandatory for every workflow.
Workflow Properties
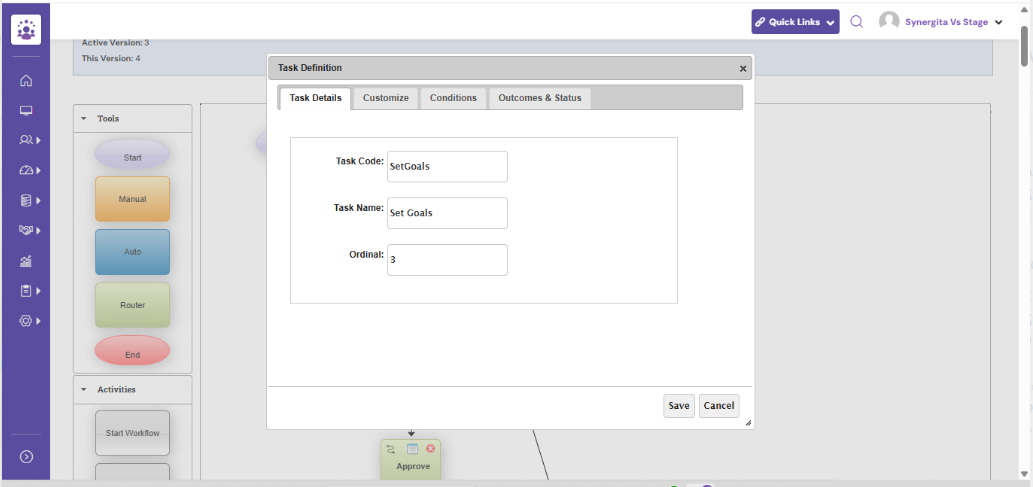
In workflow edit mode, you can configure the various properties of the workflow task.
Under Task Details, the following fields are available:
Task Code: A unique code used to identify the workflow task within the system.
Task Name: The name given to the task, which describes the activity or step being performed in the workflow.
Ordinal: Defines the sequence or order in which the task appears or is processed within the workflow.
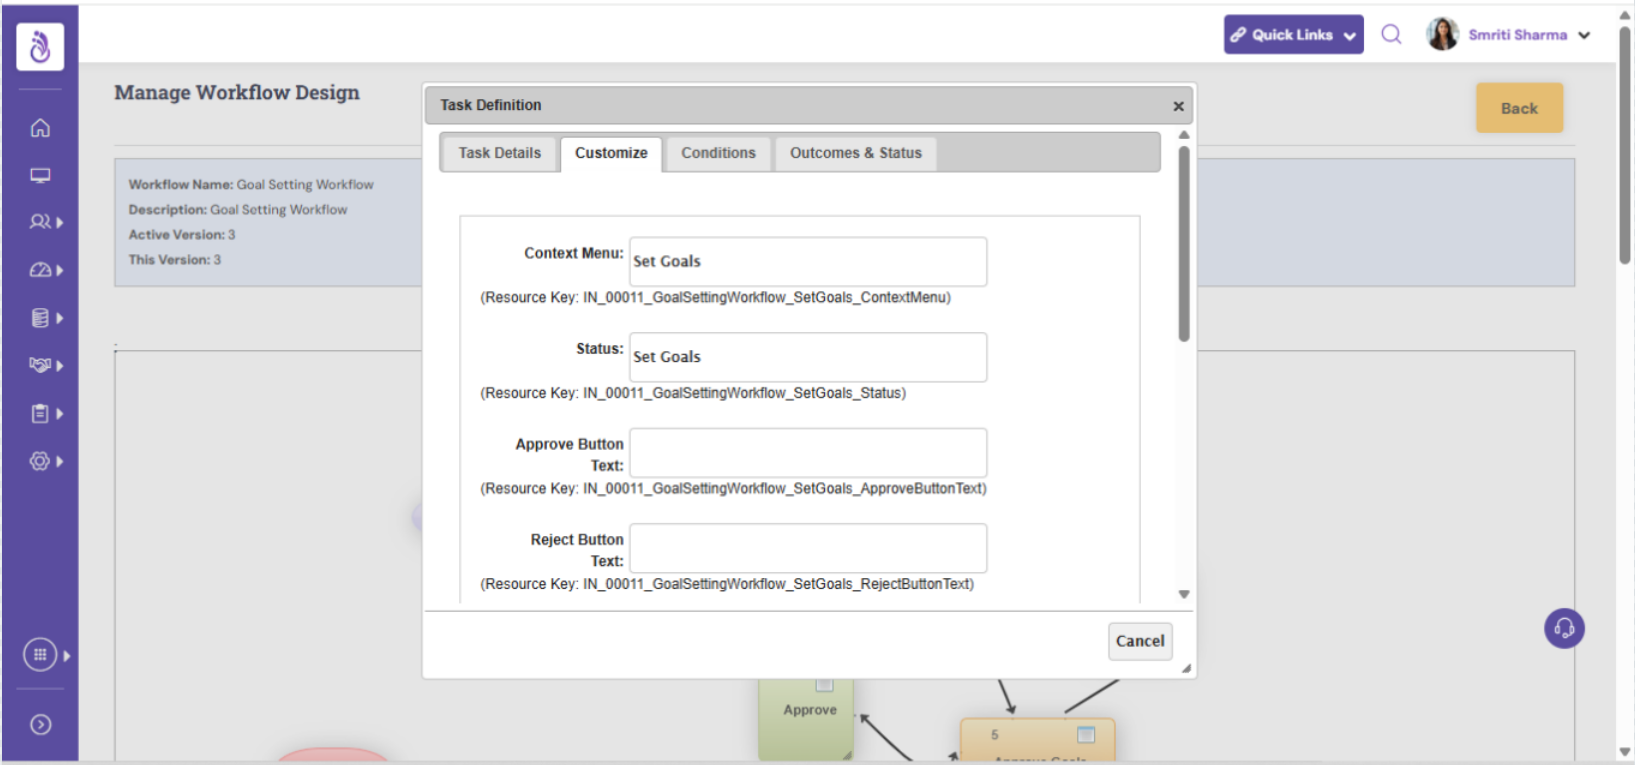
Under Customize, you can configure how the activity is displayed and how users interact with it.
- Context Menu: Defines the text displayed for the activity under the concerned employee's My Action Items.
- Status: Displays the current status of the activity in My Action Items based on the employee's progress or completion status.
- Confirmation Message: Displays a confirmation or alert message when the user submits the form after completing the activity.
- Success Message: Displays a success message after the activity or feedback form is successfully submitted.
- Rejection Confirmation Message: Displays a message asking the user to confirm their decision before rejecting the task.
- Rejection Success Message: Displays a message confirming that the task has been successfully rejected.
- Manage Privilege: Allows the HR Admin to assign the appropriate relationship or user role responsible for performing each activity.
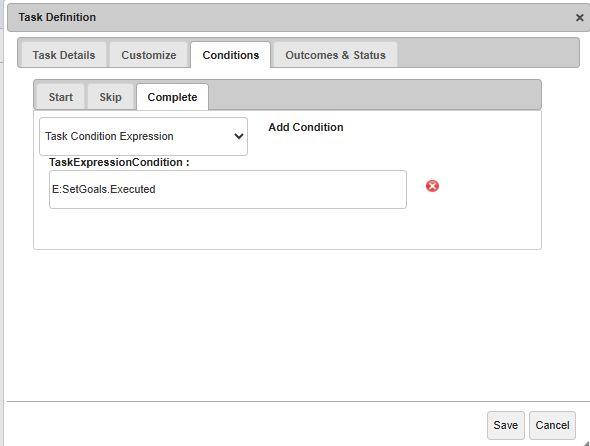
The Conditions section allows you to define rules that determine when a workflow activity is completed and how the workflow should proceed to the next step.
Kindly ensure that you should right Condition always under Complete stage
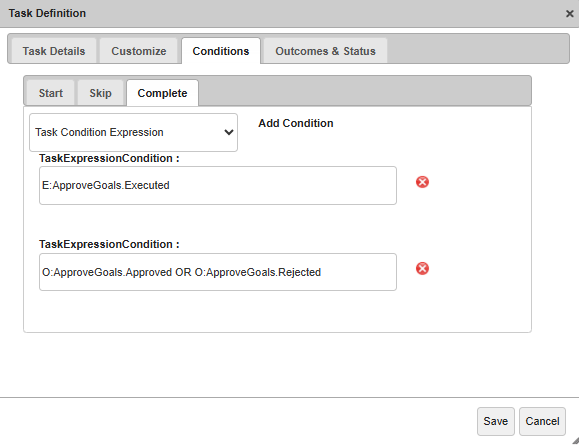
Synergita supports two types of conditions:
1. Step Execution Status: The Step Execution Status condition is used for all workflow activities to check whether an activity has been executed.
Format: E:TaskCode.Executed
Example: E:SetGoals.Executed
This condition checks whether the Set Goals activity has been executed before the workflow proceeds to the next step.
2. Activity Outcome: The Activity Outcome condition is used for approval-related activities to determine the outcome of an approval action.
The outcome condition can be configured for three levels of approval:
- First-Level Approval
| O:ApproveGoals.Approved OR O:ApproveGoals.Rejected |
This checks the outcome of the approval activity and allows the workflow to recognize either Approved or Rejected.
Once the outcome is determined, the workflow follows the corresponding route.
Approve Route Condition:
| O:ApproveGoals.Approved |
This route is followed when the user selects Approve.
Reject Route Condition:
| O:ApproveGoals.Rejected |
This route is followed when the user selects Reject.
- Second-Level Approval
| O:SecondLevelApproveGoals.SecondLevelApproved OR O:SecondLevelApproveGoals.SecondLevelRejected |
This checks whether the second-level approval has resulted in either Second Level Approved or Second Level Rejected.
Approve Route Condition:
| O:SecondLevelApproveGoals.SecondLevelApproved |
This route is followed when the second-level approver approves the activity.
Reject Route Condition:
O:SecondLevelApproveGoals.SecondLevelRejected |
This route is followed when the second-level approver rejects the activity.
- Third-Level Approval
| O:ThirdLevelApproveRecommendation.ThirdLevelApproved OR O:ThirdLevelApproveRecommendation.ThirdLevelRejected |
This checks whether the third-level approval has resulted in either Third Level Approved or Third Level Rejected.
Approve Route Condition:
| O:ThirdLevelApproveRecommendation.ThirdLevelApproved |
This route is followed when the third-level approver approves the activity.
Reject Route Condition:
| O:ThirdLevelApproveRecommendation.ThirdLevelRejected |
This route is followed when the third-level approver rejects the activity.
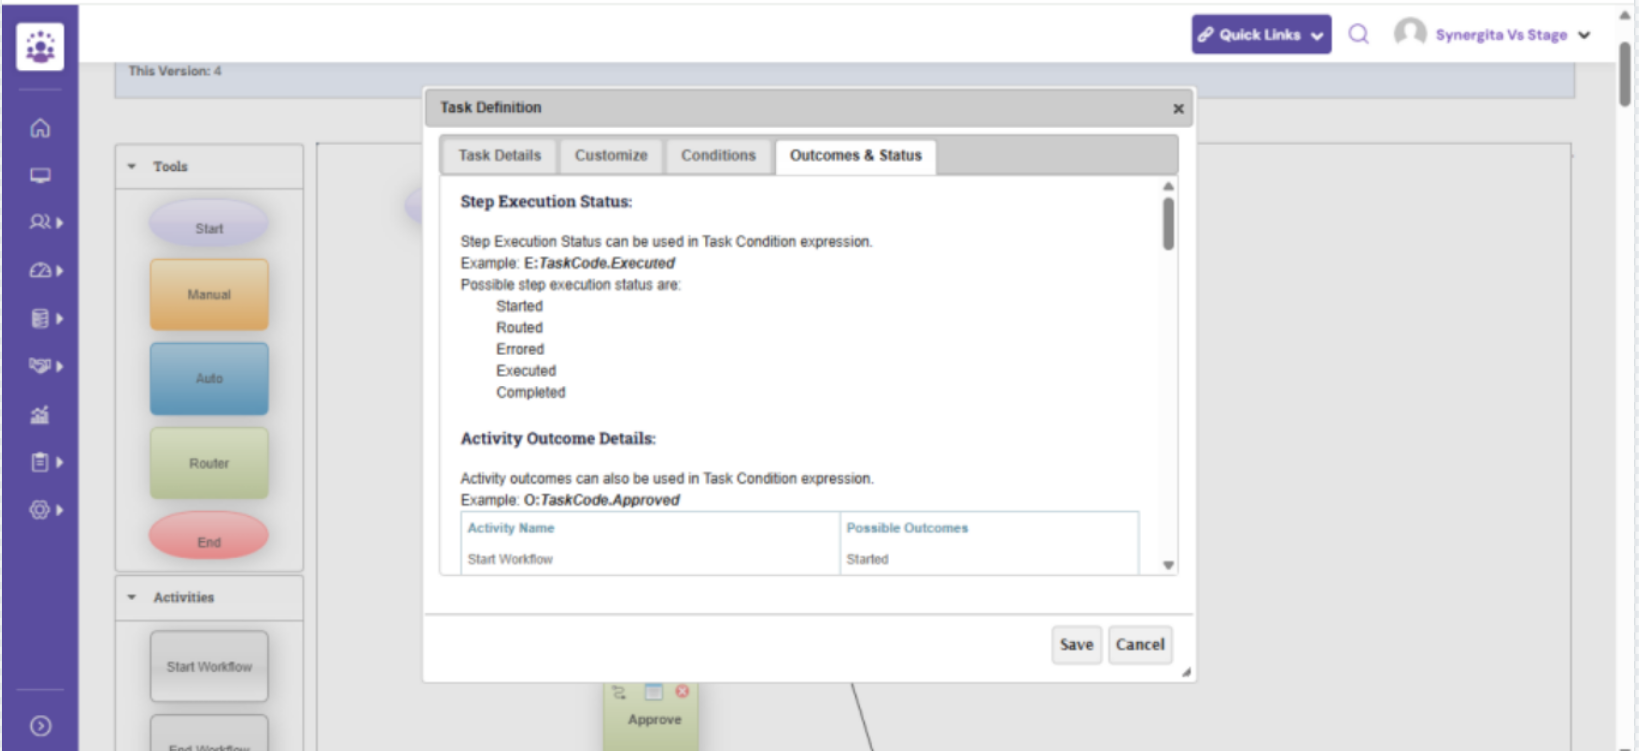
Outcomes & Status: Lists the available activity outcomes and execution statuses for the selected task. You can use the appropriate outcome or status in the Task Condition Expression based on the workflow requirement.
Linking Tool / Connector
The Linking Tool, represented by an Arrow, is used to connect activities and define the sequence of the workflow. It determines which activity follows next and how the workflow moves from one step to another.
To connect activities, drag and drop the linking tool from one activity to the linking tool of another activity. A successful connection is displayed as an arrow.
The connection arrow indicates the direction of the workflow, showing how the output of one activity becomes the input for the next activity and triggers the subsequent step.
PS: Synergita implementation for your Organization may vary from how the features are described here. The screenshots given here may also be different from what you see in your system. Please talk to the concerned person in the Organization for any specific queries.